Introducing… Zip Pay!

Introducing… Zip Pay!


Introducing… Zip Pay!

We’ve teamed up with zipPay to let you pay monthly for the things you want today.

zipPay is a smart and easy payment option, powered by zipMoney that let’s you shop today and pay later for your purchases.

  • Key features and benefits
  • up to $1,000 account to shop anytime
  • Easy monthly payments
  • Pay no interest ever

Shop better, faster, smarter online.

zippay-footer-artwork-01-e1459588638829

Frequently asked questions 

Who can apply?

Any Australian citizen or permanent resident, who is 18 years or older and is employed, earning at least $300 per week.


How much does it cost?

At the end of every billing month, you can choose to pay off your balance in full, or simply make a payment that suits your budget (note: there is a minimum repayment of $40 per month required). A $5 monthly account service fee is added to your account for any month you have an outstanding balance.


There is NO establishment fee to setup your account and NO INTEREST ever! If you have repaid your balance in full within 30 days you will never be charged any fees! Additionally, once you have repaid your balance down to $0, no fees will ever be charged to your account – it will simply remain open waiting for you to use again to make additional purchases.


How can I apply?

You can get your account here or while making a purchase at any participating stores.To create a zipPay account, all you need is a social media account and to confirm the details that you would normally enter when shopping online (e.g. your name, email, mobile, address, DOB and gender). Subject to approval, this process takes only seconds after which you can complete your purchase and pay for it later! Once you’re approved for your zipPay shopping account, you never have to apply again and can continue to reuse it as much as you like.


Need some help or have questions about zipPay?

Call us on: (02) 8294 2345
Or email us at customercare@zipmoney.com.au


Read more about zipPay here


The Ultimate Easter Egg Hunt!

The Ultimate Egg Hunt

What better way to celebrate Easter Sunday than with a traditional Easter egg hunt?

Plum Easter Egg Hunt

The Great Outdoors

Weather permitting, there’s nothing like an outdoor egg hunt!

A garden or outdoor space will provide plenty of hiding places for your loot. Behind plant pots, buried in flower beds or stashed underneath garden furniture  are all perfect places to obscure the eggs.

Keep your audience in mind when looking for places to hide the prize. Up a tree might be just the right height for you but your little ones may struggle (unless you want to hide some eggs for yourselves of course, which we also strongly encourage!).

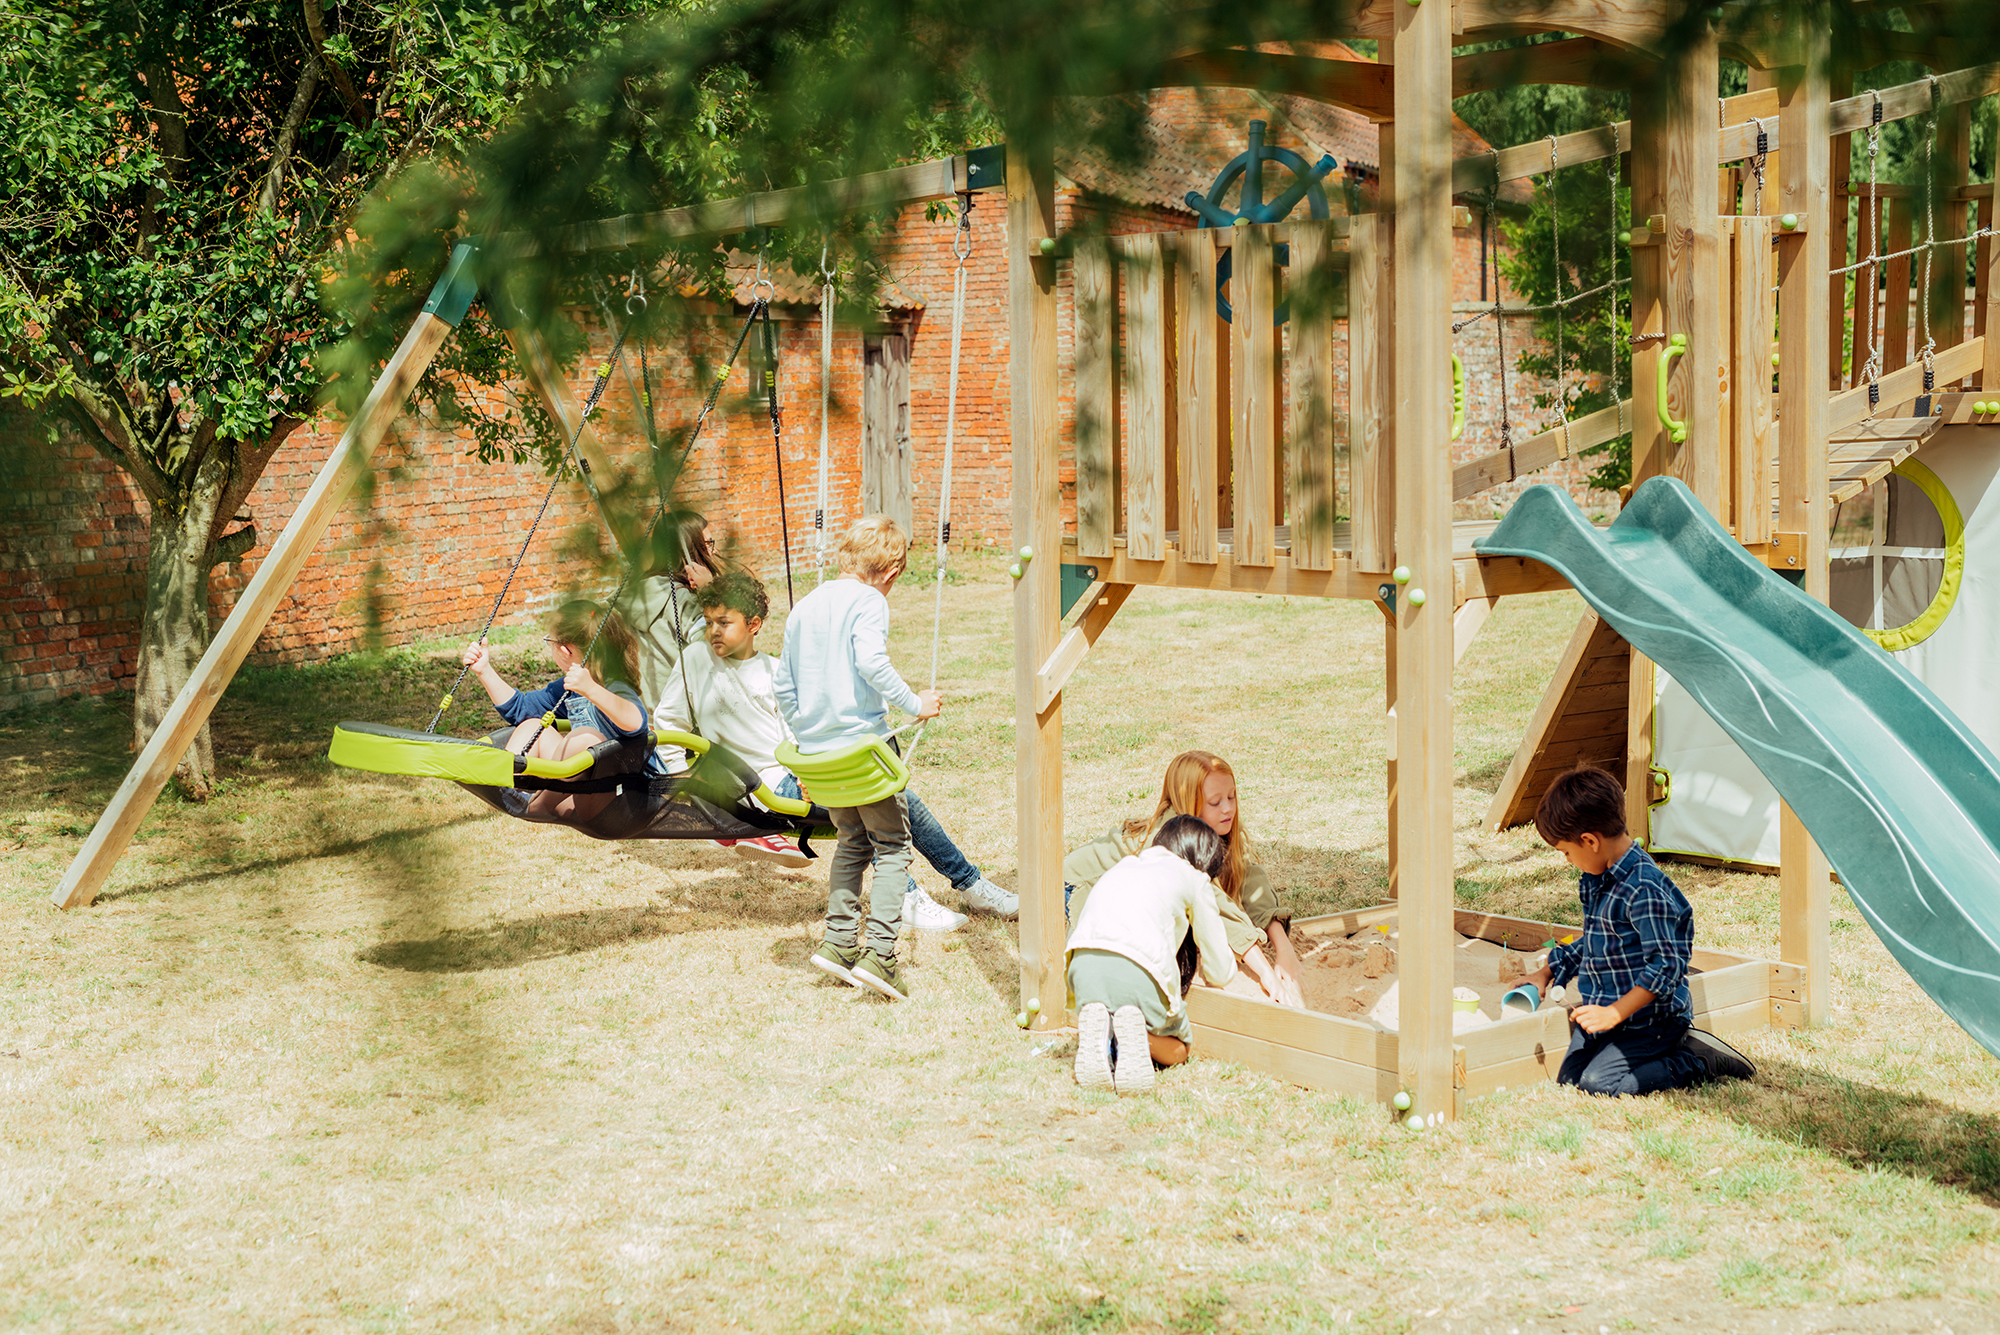
If you have any, outdoor play equipment also provides some handy nooks and crannies to hide chocolate!

Easter Egg Hunt 4

Be Clued Up

Little ones will love to hunt high and low for their eggs, so set them free!

Keep the suspense built for older children by leaving a trail of clues around the garden.

For the ultimate explorers, creating a map of the garden with a trail will help them as they navigate their way to the chocolatey treasure. Don’t forget the x to mark the spot!

Egg Hunt 3

Keep it Fair

Split children into teams or consider colour coding your eggs to make sure the littlest ones still have the fairest chance.

Egg Hunt 2


Happy Hunting!

Egg-scelent Easter Baking!

Easter is just around the corner and what better way to join in the celebration than with some baking! We’ve put together some of our favourite recipes we’ve found to help you get inspired and join in the fun with your little one over the Easter break. So put on an apron, roll up your sleeves and wash your hands, and get ready to join in some baking fun!

41071_Peppermint-Kitchen_02_z


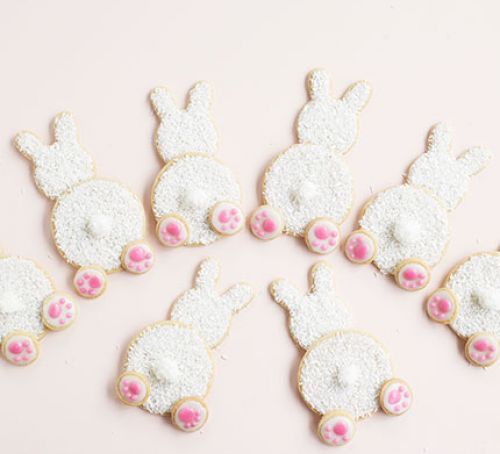
WHITE RABBIT BISCUITS

These adorable bunny biscuits will hop off the plate faster than you can bake them. They make a great Easter activity for kids or an extra special gift for someone you care about.
PREP: 1 HR, 10 MINS / COOK: 45 MINS / MAKES 30-35 BISCUITS OR 15 BUNNIES


white-rabbit-cookies

Ingredients

  • 200g unsalted butter, at room temperature
  • 400g plain flour
  • 280g caster sugar
  • 1 egg
  • ¼ tsp vanilla extract
  • a pinch of salt
  • ½ tsp cream of tartar
  • 600g icing sugar
  • 170g pack of desiccated coconut
  • pink food colouring gel
  • 15 mini marshmallows

You will also need:

  • 1 x rabbit head-shaped cookie cutter
  • 1 x 7cm round cookie cutter
  • 1 x 3cm round cookie cutter

Method

  1. Heat oven to 180C/160C fan/. Lightly rub the butter and flour together with your fingertips until the mixture looks like fresh breadcrumbs.
  2. Mix the sugar and egg together in another in a bowl with a whisk and when it is really well combined and runny add it to the flour mixture.
  3. Add all the other ingredients and squish it together with your hands, keep working the dough until it’s smooth, soft and comes together in one piece.
  4. Roll the dough out on a lightly floured surface with a rolling pin until it is about half a centimetre thick. Cut into shapes. We did 15 rabbit heads, 15 large circles and 30 mini circles.
  5. Place your biscuits on baking sheets lined with baking paper and bake in batches for about 15 mins (or until they are lightly golden at the edges).
  6. Let them cool in the tin for a few minutes before carefully transferring them to a wire rack to cool completely and become crisp.
  7. While the biscuits cool mix enough cold water with the icing sugar to create a thick icing. Place a quarter of the icing in another bowl and add a very small amout of pink gel food colouring. Transfer both the white icing and the pink icing into disposable piping bags and snip off the end to make a very small nozzle on the pink icing and a wider one on the white icing.
  8. Pipe white icing over the small round biscuits and leave to dry. Then pipe white icing to cover all of the large circular biscuits and the rabbit biscuits (be fairly sparing and spread it out with the back of a spoon – it doesn’t have to be neat on these ones). Once you’ve iced each one sprinkle generously with dessicated coconut before the icing dries.
  9. Take the pink icing and use to create paws on the smaller circles then stick 2 of them onto each of the large circles using icing like glue. With the icing you have left, coat the marshmallows and cover those in coconut too before sticking them onto the middle of the larger circles to create a fluffy tail. Leave to set completely for about 15-20 mins then serve.

Recipe by Miriam Nice at http://www.bbcgoodfood.com/recipes/white-rabbit-biscuits (March 2016)

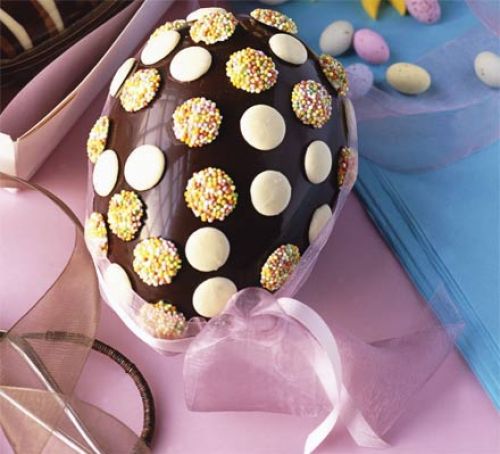
Chocolate Button Egg

It’s time to make your own Easter eggs! Get creative in the kitchen and design your very own.
PREP: 30 mins / MAKES 1 EGG

recipe-image-legacy-id--560808_12

Ingredients

For the egg

  • 200g good-quality dark chocolate, plus a little extra for decorating

To decorate

  • 25g bag chocolate button
  • 25g bag white chocolate button, with speckles
  • ribbon, approx 50 cm long

Special equipment

  • 2 chocolate egg moulds
  • clean flat pastry brush or small paintbrush

Method

  1. Break the chocolate into pieces and gently melt in a heatproof bowl over a pan of simmering water, making sure the bowl doesn’t touch the water. Stir until smooth, then take off the heat and leave until cool, but still runny. Spoon a quarter of the chocolate into one of the egg moulds and spread thickly over the inside with a flat pastry brush or paintbrush. Be sure to cover the sides well, as this makes it easier to join the edges. Check that the chocolate is even by holding the mould up to the light. Repeat with the other mould. Leave in a cool place to set, then chill for 5 mins. TIP: Putting the egg halves in the fridge once the chocolate has set makes it easier to add another layer of warm chocolate. Don’t be tempted to leave the moulds in the fridge any longer than necessary as condensation could cause the chocolate to discolour.

  2. Re-warm the remaining chocolate and repeat the process for each side of the mould, saving about 1 tbsp of chocolate for later. Use a knife to scrape away any excess around the rim of the mould to give a clean, straight edge. Turn out each half onto a sheet of greaseproof paper, carefully pulling away the mould until it releases itself.
  3. Place one half of the egg on its back (you can create a nest of scrunched greaseproof paper to stop it from rolling about). Warm the reserved chocolate and brush around the edge of the egg. Place the other half on top and press together. You can seal the join further by brushing with a little more chocolate and filling in any jagged edges or holes. Leave in a cool place to set firm.
  4. To decorate, use the paintbrush to dab a little chocolate on the backs of the chocolate buttons. Gently press them onto the egg. For the finishing touch, tie the ribbon around the middle to hide the join

Recipe by BBCGoodFood at http://www.bbcgoodfood.com/recipes/5808/simple-chocolate-button-egg (April 2008)

How to make a feather headdress

Does your child love dressing up? Give this project a go and add this fun play accessory to your little ones costume box!

feathreheaddress-pic-kidspotWe think this project is best suited for children aged 5 years or older and a parent.


What you will need:

  • a packet of white feathers
  • watered down red, yellow and blue paint in individual pots
  • PVA glue
  • two flat trays
  • paintbrush
  • glitter (optional)
  • elastic headbands
  • needle & thread


How to make the coloured feathers:

1) Divide the feathers into three piles and dip them individually into the paint pots Allow to drip a little and lay flat to dry.

2) Put some glue onto a flat tray and then water it down, using a paintbrush to mix.

3) Put a small pile of glitter ontothe second flat tray and dip each feather into the glue and the glitter

4) Dip each feather into PVA glue and place on the headband. Once the glue has dried, sew the feathers to the headband (this is a job for a grown up!).

5) You now have a cool play accessory that will bring hours and hours of fun!

Adapted from: Kidspot – How to make a sparkly feather headdress. Retrieved from http://www.kidspot.com.au/how-to-make-a-sparkly-feather-headdress/


Physical Activity Recommendations

Physical Activity Recommendations

Being active is crucial for growing children. By creating a routine that consists of physical activity, it creates a solid foundation for health values that continue throughout the later years of their life. Not only does physical activity create a healthy lifestyle, it enables children to widen their social groups and create life long friendships.
Studies suggest that these two points are very important in a child’s routine.3

  1. Include at least 60 minutes a day of moderate and vigorous activities in a child’s routine. Examples include walking, bike riding and active play.
  2.  Keep electronic media usage under two hours per day, especially during daylight hours. Examples include computer games, television, and computer.

Keeping a child physically active in their younger years provides many benefits including:

  • Promote healthy growth and development
  • Build strong bones and muscles
  • Improve balance and development skills
  • Maintain and develop flexibility
  • Help maintain a healthy weight
  • Improve posture
  • Improve cardiovascular fitness
  • Reduce stress and anxiety
  • Improve self-esteem

You can improve your child’s physical activity levels and overall health straight away by:

  • Be a role model – be active with children (they will be inspired by you)!
  • Challenge yourself – if they play a sport or enter an event, enter it with them!!
  • Include physical activity in family outings
  • Support active play, recreation and participation in sport
  • Encourage and support walking and cycling to school
  • Be prepared – have a Frisbee, balls or a kit in the car ready to stop and get active
  • Give gifts or toys that promote physical activity such as bats, skipping ropes or skates.
  • Talk to the children and explain why active is so important!

Most importantly, kids need the opportunity to participate in a variety of activities that are fun and suit their interests, skills and abilities. Variety will also offer your child a range of health benefits, experiences and challenges. By creating an active routine for a child, it enables a healthy lifestyle to be formed that can be continued in all stages of their life.

Adapted from: http://www.summitfitnessstudio.com.au/physical-activity-recommendations-for-5-12-year-olds

For further information check out this site: Australia’s Physical Activity Recommendations for 5-12 year olds
http://www.health.gov.au/internet/main/publishing.nsf/Content/9D7D393564FA0C42CA256F970014A5D4/$File/kids_phys.pdf